If you want a full premium version of all our extensions in SuperPWA. Purchase then Membership Plan where you can get all extension. Upgrade to the Most Powerful SuperPWA Plugin without the high cost.
Follow the below steps:
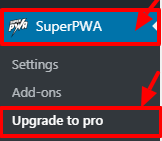
Step 1: First go to WordPress Dashboard -> Navigate to SuperPWA -> Click on the “Upgrade To Pro”
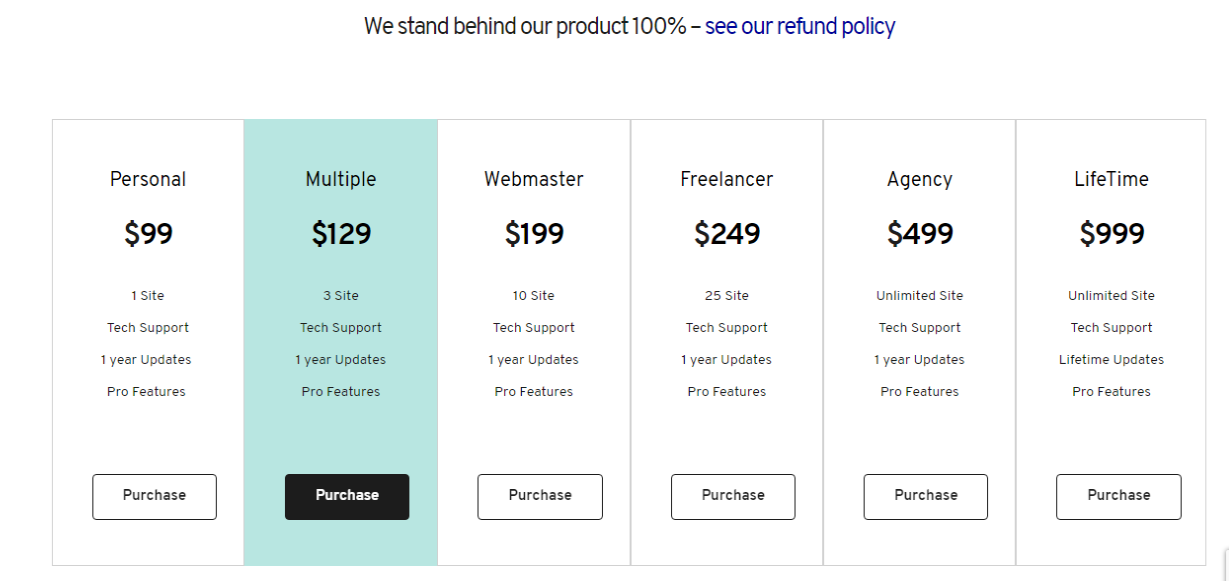
Step 2: Once you click on the Upgrade To Pro it will be shown All-Access of Membership Plan.
Step 3: It will display a bundle of Membership Plans. Which type of package you want to select that package.
- Personal: In this package, the user can access 1 site and 1 year of Updates Pro Features.
- Multiple: In this package, the user can access a maximum of 3 Site and 1 year Updates Pro Features.
- Webmaster: In this package, the user can access a maximum of 10 sites and 1 year Updates Pro Features.
- Freelancer: In this package, the user can access a maximum of 25 sites and 1 year Updates Pro Features.
- Agency: In this package, the user can access the Unlimited site and 1 year Updates Pro Features.
- LifeTime: In this package, the user can access the Unlimited site and 1 year Updates Pro Features.
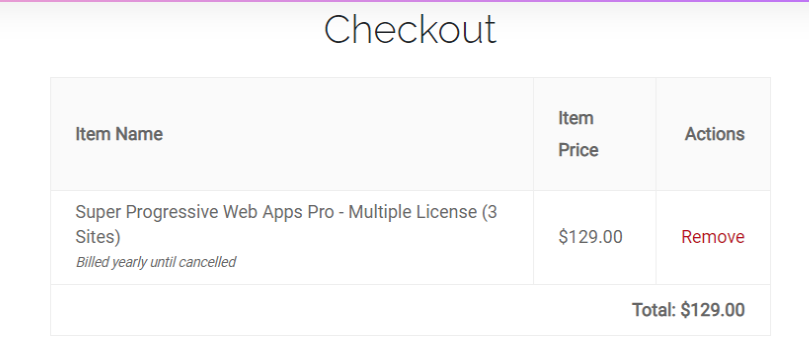
Step 4: Which package you want to select that package and click on the purchase button this page redirect to the next page.
- Item Name: Name of Package selected will be shown.
- Item Price: Price of the package will be shown.
- Actions: If user clicks on remove this item will be removed from this table.
Step 5: Renewing your license key will give you continued access to Premium downloads. If your license key is expired, you can renew it click to enter it link.

Step 6: User can scan choose any of the payment methods in your PayPal account or Credit Card as your preferred payment method in the Payments section of your account settings.

Step 7: If User don’t have account then the user can create a new account.
Personal Info: In this form, user can enter personal information like email address, first name, and last name.
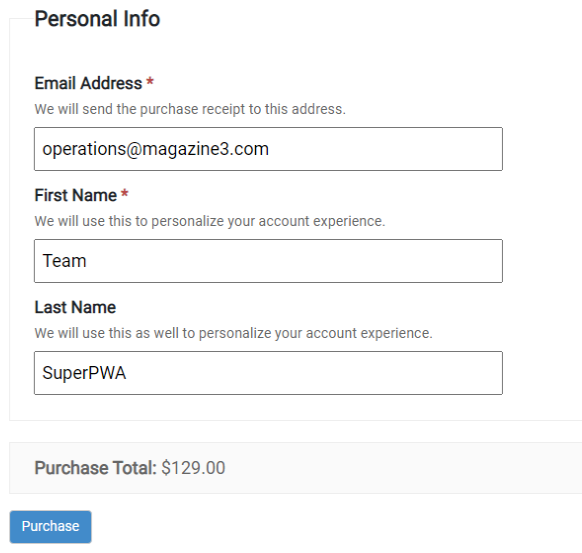
Step 8: All information is correct then click on the “Purchase” button.
Step 9: Once purchase done got to the Account Area
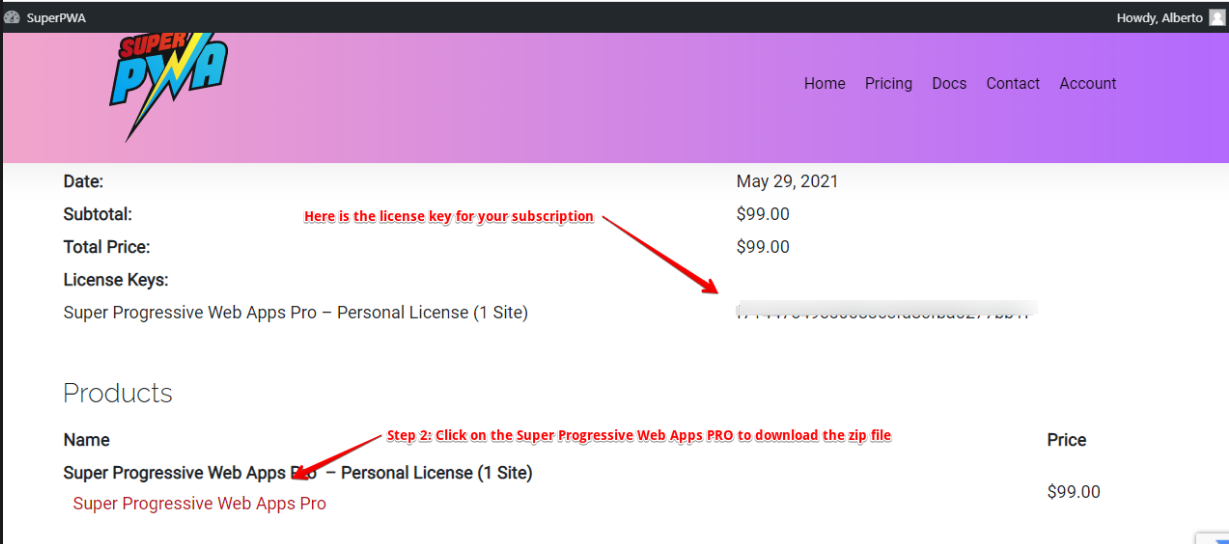
Step 10: Once you login to the account area you will get this screen and you need to click on the “View Details and Downloads” link like below the screenshot.”

Step 11: Here you can find the license key and product zip file and after that you can copy this license key and under product you find “Super Progressive web Apps PRO” link. Click on the link then you can see a zip file downloaded at your end.
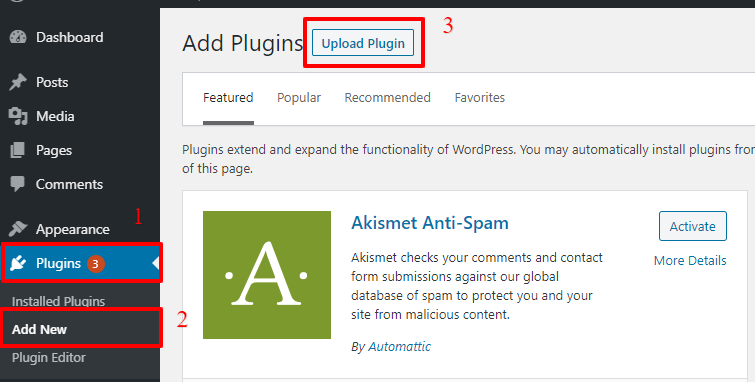
Step 12: Need to upload pro plugin After purchase
Step 13: Upload the PRO plugin (which will get from your account area) in your plugins section (Plugin -> Add new -> upload ). Now you are ready to add a license for the next step.
Step 14: Super PWA PRO is a Paid Plugin Extension. You won’t find that extension in the WordPress Plugin directory. So you have to upload this plugin after purchasing.
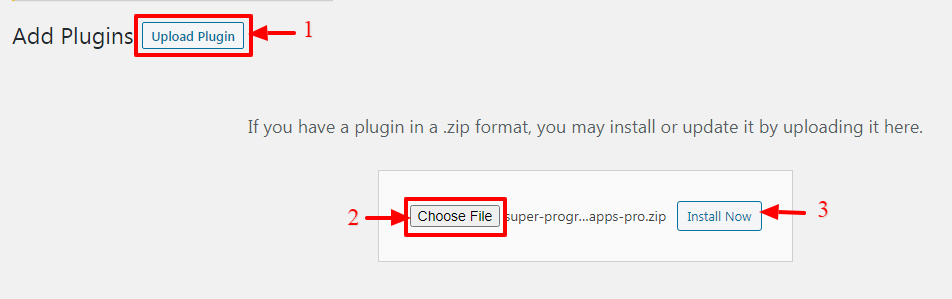
- Click on Upload Plugin
- then choose the “ Super PWA PRO” Extension from which you already downloaded after purchase.
- After that, click on Install Now
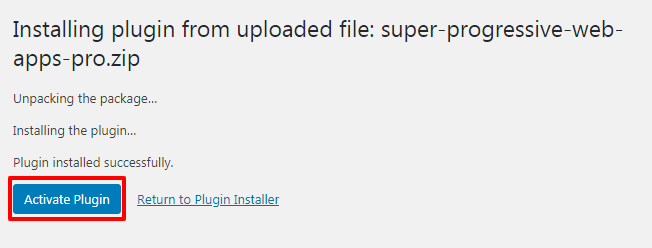
Step 15: After Uploading the plugin, Click on Activate Plugin
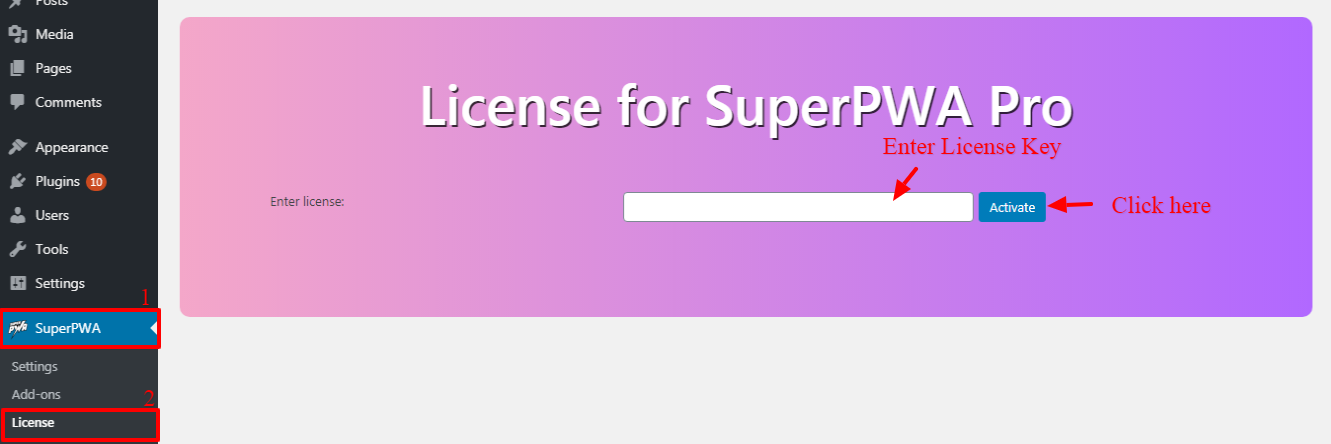
Step 16: You need to enter the license key for this you need to go to WordPress Dashboard -> SuperPWA -> License -> Here you will get the Add-on to enter the License key and click on the “Activate” button.
That’s it for this tutorial!
We hope we’ve clear your doubts in case If you have any feedback or questions, Just contact us here and we are always available for you.